Mango
Mango is a viewer for MRI and a tool for creating and editing masks. It is similar to MRIcron and itk-snap.
Warning
MRIcron assumes isotropic voxels (or near isotropic). This means it is not well suited to drawing on clinical data which often has high resolution in-plane but very thick slices.
Mango has good online documentation. Below I describe several features that are especially valuable.
iMango
Mango has a companion iPad app called iMango which is very nice for viewing NIFTI images and editing masks. If you use the Apple pencil, or even a stylus, iMango is much nicer than drawing with a mouse. Furthermore, by working with a native iPad app, you are untethered from your computer (you can sit in front of the TV and edit for hours). There are multiple options for data transfer to and from the iPad.
Edit a NIFTI header
Mango has an easy NIFTI header editing tool. There are command line NIFTI header editors in the FSL Utilities (fslhd and fsledithd) and in AFNI (nifti_tool), but they are much more complicated. Why do you want to edit the header? The most common problem is that the image dimensions are wrong. This is especially true if you have a NIFTI image that was constructed in a peculiar way (like from a stack of jpgs). Below is a description of the editing process.
- Always make a copy of your valuable image before changing the header information. It is possible to corrupt the image and never be able to open it again.
- File ➜ Image info
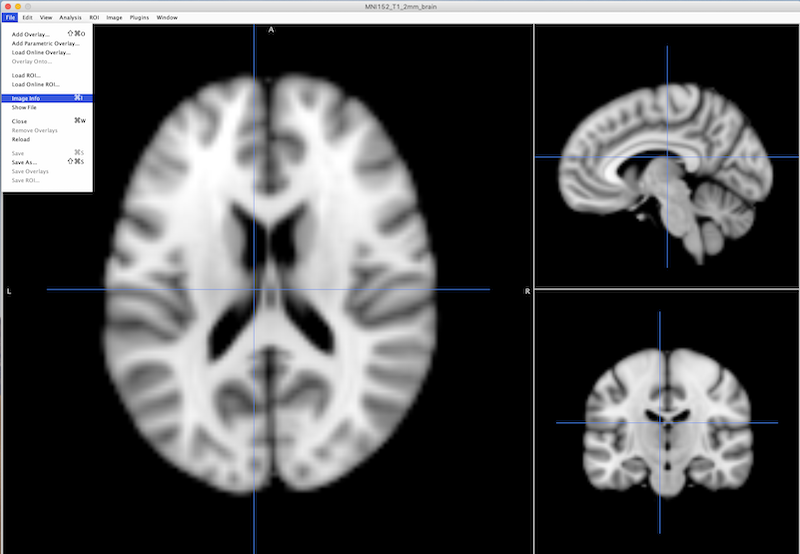
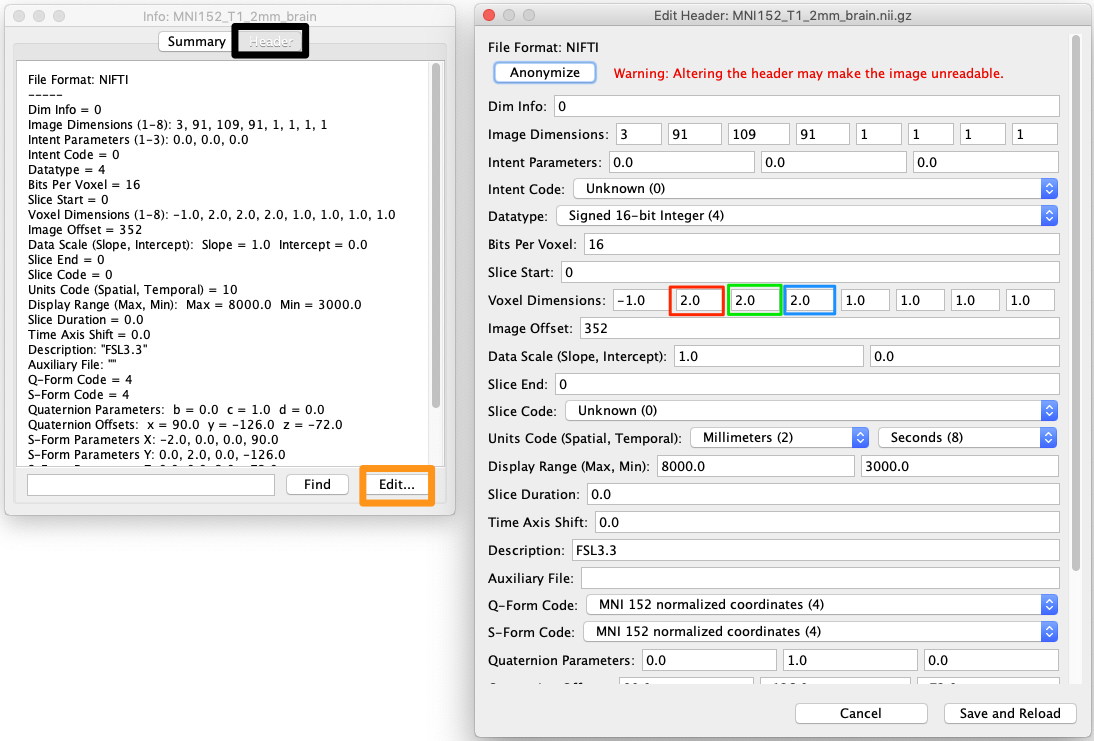
- Choose Header (next to the Summary tab at the top of the interface: black square on left, figure below).
- Choose Edit (orange square on bottom left of figure)
- The x,y and z dimensions are in red, green and blue boxes respectively on the right of the figure.
- Choose Save and Reload (bottom right of figure).
That’s it.
Create a NIFTI viewer Webpage
You can use Mango to create an HTML page that displays a self-contained interactive NIFTI image viewer. Simply click the single HTML file on disk to display your images in a web browser | N.B. I have had problems with Internet Explorer, but Firefox and Chrome work well.
Why an HTML NIFTI Viewer is Useful
- The HTML viewer can be used by anyone, whether or not they have neuroimaging software installed.
- In Powerpoint, you can insert a relative link to any object, including the HTML NIFTI viewer. Instead of having a static image in your neuroimaging presentation, or having to open a viewer and load the relevant images, you simply click the HTML page and you can move around in 3D and control overlay opacity.
- If you use a picture of the NIFTI viewer for your Powerpoint link, it looks nicer and can substitute if something goes wrong with the link.
- It helps to keep the HTML page in the same folder as your Powerpoint.
- Keep in mind, that when you click the link on Mac, Powerpoint keeps the focus, so you don’t see the HTML page (you can use command-tab to bring it to the forefront).
- On Windows, the HTML page gets the focus as soon as you click the Powerpoint link.
- I have had problems with Powerpoint changing the links I define, so recheck these before a presentation.
- It is possible to post your HTML viewers to a Papaya web server, which you can install using a web server like Tomcat
- If you don’t want to install a web server, then you can go to this web address http://rii.uthscsa.edu/mango/papaya/index.html and drag NIFTI or DICOM files onto the interface. * You can even choose File ➜ Add DTI vector series and choose the FSL V1 image. Then click the color rainbow icon on the upper right and you can modulate the image with an FA image.
How to Make an HTML NIFTI viewer
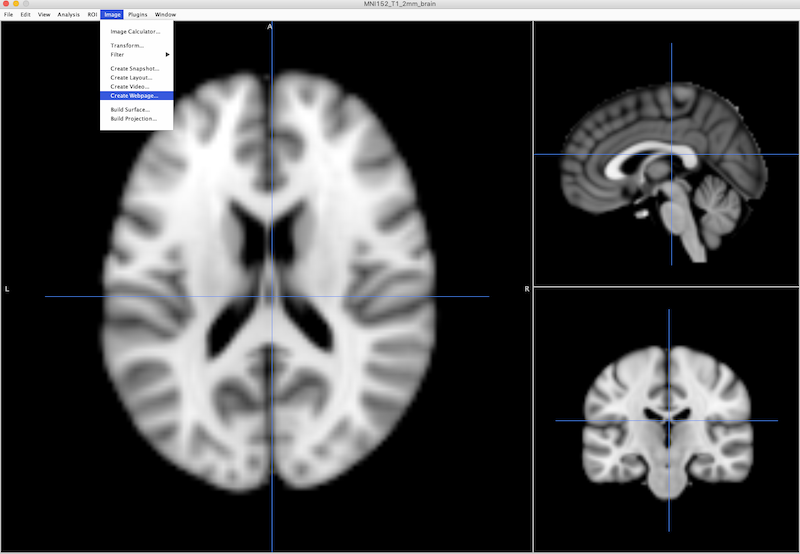
- With an image, and any overlays of interest displayed in Mango, choose Image ➜ Create Webpage.
Warning
As of July 25, 2019: Depending on the way the input data is stored, Left and right can be switched in the HTML viewer. See Ensure Standard Right-to-Left Orientation in NIFTI Header for more information.
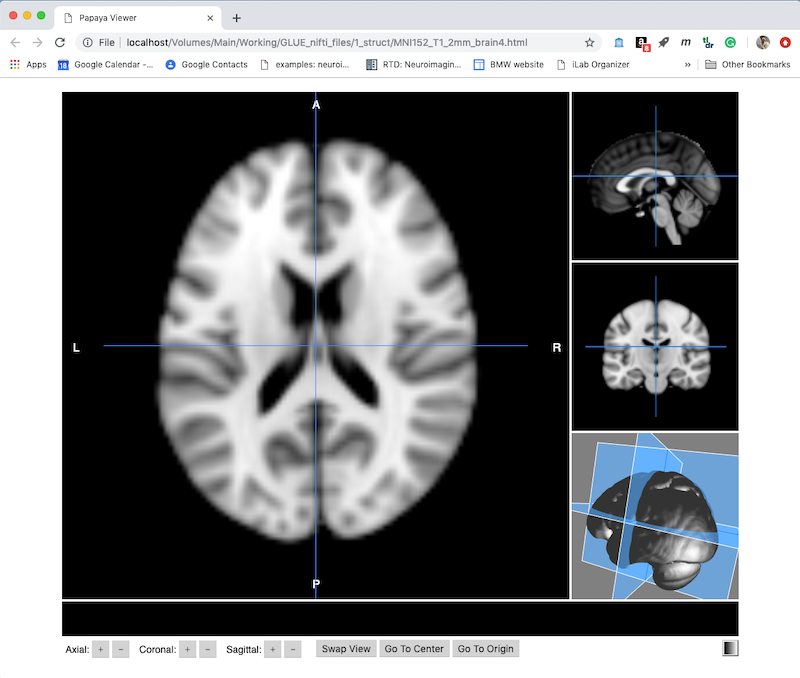
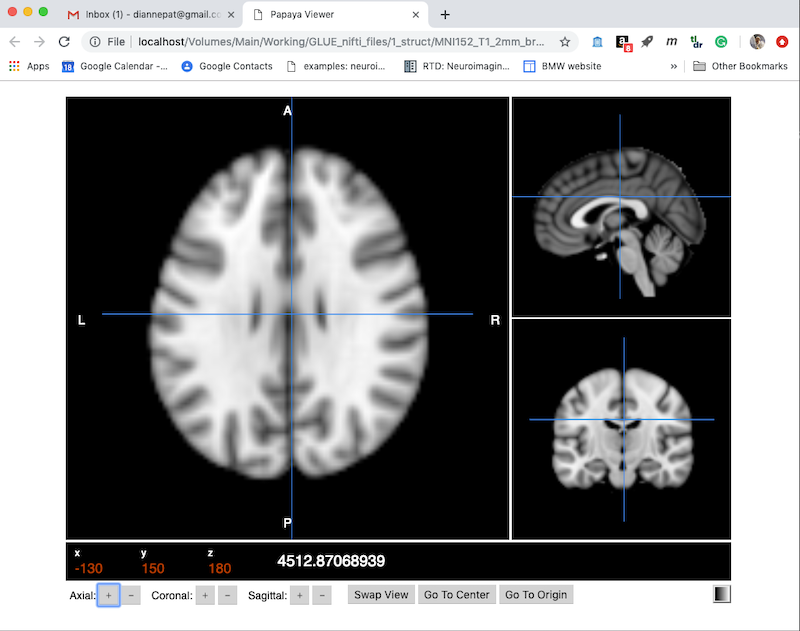
- Choose Create to get a default viewer like this. Note this is displayed as a webpage, and has several useful controls along the bottom.
- You can drag the cursor and see your current x,y,z position and intensity. You can also use the + and - buttons next to x,y,z along the bottom to move one voxel at a time.
- On the bottom right is a color table control (currently set to greyscale).
- Swap View will change which orthogonal plane appears in the larger panel on the left.
- Click More Options (upper right) to expand the choices to what you see below:
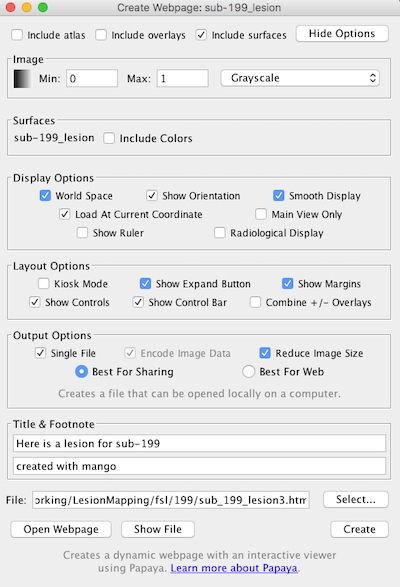
- You can make a title, e.g., “Here is a lesion for sub-199” and a footnote (e.g., “created with Mango”).
- Kiosk mode hides the menu. If you choose Main view only then it only shows one panel, though you can still swap views.
- You can build a surface in Mango: Image ➜ Build Surface and include that in the webpage:
- Choose “include surfaces” (upper right) to display a 3D object then “swap view” (lower right on webpage) to make the render the main panel and then move around. https://github.com/rii-mango/Papaya/wiki/User-Interface-Features