SPM Lesion Normalization with Tissue Probability Maps
Maintainer: Dianne Patterson Ph.D. dkp @ email.arizona.edu
Date Created: 2018_06_25
Date Updated: 2019_06_26
Tags: SPM, normalization, standard space, lesion, anat, TPM
Software: At least Matlab 2016B, SPM12
Goal: Warp a native space lesion mask (and optionally a native space anatomical image) into standard (MNI) space. In this procedure we use the lesion mask to define an additional tissue probability map (TPM) that influences the warp.
Data
- Images must not be zipped (i.e., T1w.nii is okay, but T1w.nii.gz is not).
- An anatomical (anatomical) image, usually T1 weighted, but could be T2 or flair weighted.
- A lesion mask with values of 1 in the lesion and 0 elsewhere.
- See Batch and Scripting for suggestions about file naming that will make it easier to script your resulting batch job.
Steps
Coregister: Reslice Lesion Mask to TPM Space
- The lesion mask must be in TPM space before it can be used to define the additional tissue type.
- Open Matlab (and optionally navigate to the relevant directory).
- Type spm at the Matlab command prompt. This will open spm
- Click the fMRI button which will open the windows you need.
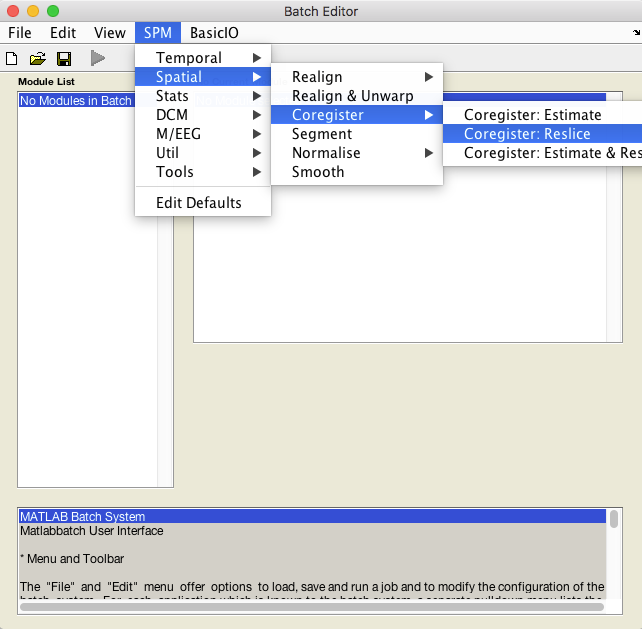
- Select Batch and from the menubar: SPM ➜ Spatial ➜ Coregister ➜ Coregister: Reslice.
- An X is displayed for the two parameters that must be specified: Image Defining Space and Images to Reslice.
- The Image Defining Space is the TPM.nii, typically found in the spm12/tpm directory.
- The Images to Reslice will be the lesion mask.
- Under Interpolation choose Nearest neighbour This will insure the lesion mask keeps mask values at or near 0 and 1.
- All other values should be left as their defaults.
- This is the first module of your batch job.
Segment: Estimate Warp Field
- From the batch editor choose: SPM ➜ Spatial ➜ Segment
- Under Volumes, an X is displayed, indicating that this parameter must be specified. Specify the native space anatomical image that you used to draw the lesion.
- Click Tissues in the module options.
- Under Current Items: Tissue, click New Tissue.
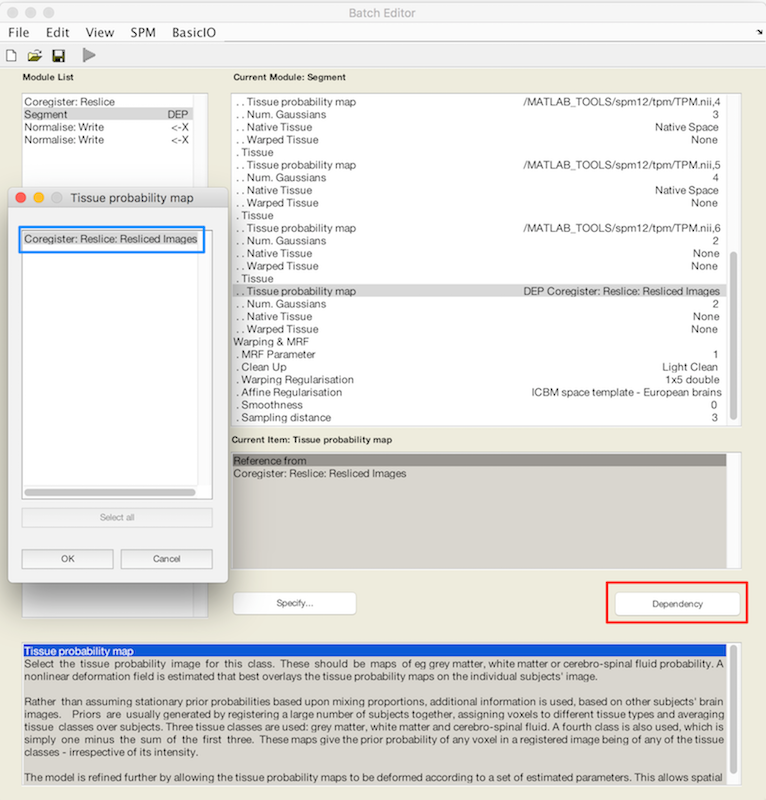
- Scroll to the bottom of the tissue list, where you should find an X for Tissue probability map.
- Choose Dependency (red box). In the popup Tissue Probability map choose Coregister: Reslice: Resliced Images (blue box). This is how you refer to the resliced lesion map r* that you have not yet created.
- Scroll down to the bottom of the module options, and set Deformation Fields to Forward. The Forward warp will be used to warp native space images into standard space.
- All other values should be left as their defaults.
- This is the second module of your batch job.
Normalise: Apply the Warp Field to Lesion Mask
- From the batch editor choose: SPM ➜ Spatial ➜ Normalise ➜ Normalise: Write
- Double click Data. Deformation Field and Image to Write now appear in the menu.
- For Deformation Field, choose the Dependency button and specify Segment: Forward deformations
- Under Image to Write, specify the native space lesion file that you want to warp.
- Under Interpolation choose Nearest neighbour This will insure the lesion mask keeps mask values at or near 0 and 1.
- All other values should be left as their defaults.
- This is the third module of your batch job.
Normalise: Apply Warp Field to Brain and Head
- You should apply the warp field to the original native space anatomical image as well. This is a sanity check because you can easily see inappropriate deformations of the whole head that you might not notice in the lesion file alone.
- Repeat the first four steps above to add a fourth batch module.
- Add the native space image for Image to Write.
- Use the default interpolation: 4th degree B-Spline.
- All other values should be left as their defaults.
- This is the fourth module of your batch job.
Run Batch and View Results
- Run the batch module by clicking the green go button (upper left on batch editor).
- Reslicing produces a new lesion file prefixed with r to indicate it has been resliced.
- Segmentation produces:
- Files prefixed with c for each tissue type and the skull.
- A seg8.mat file containing segmentation parameters.
- A deformation field image with y prepended.
- If you elected to create an Inverse deformation as well, that will be prefixed with iy.
- Normalization produces:
- A lesion image in standard MNI space. It has a w prefixed to the name to indicate that it has been warped.
- An anatomical image in standard MNI space, also with a w prepended.