SPM Lesion Normalization
Maintainer: Dianne Patterson Ph.D. dkp @ email.arizona.edu
Author: Alyssa Sachs
Date Created: 2018_06_21
Date Updated: 2019_11_14
Tags: SPM, normalization, standard space, lesion, anat
Software: At least Matlab 2016B, SPM12
Goal: Warp a native space lesion mask (and optionally a native space anatomical image) into standard MNI space.
Data
- Images must not be zipped (i.e., T1w.nii is okay, but T1w.nii.gz is not).
- A structural (anatomical) image, usually T1 weighted, but could be T2 or flair weighted. All testing here was done with T1 weighted images.
- A lesion mask with values of 1 in the lesion and 0 elsewhere.
- To facilitate script processing (see Batch and Scripting), it is useful for equivalent files in different subject directories to have equivalent names (e.g. T1w.nii in all directories rather than sub-030_T1w.nii, sub-031_T1w.nii etc.).
- You can use symbolic links to retain your original naming structure while facilitating the scripting, e.g.,
ln -s sub-030_T1w.nii T1w.nii. Just insure that in the instructions below, you select the link, so you are operating with simplified file names. N.B. aliases are not the same as symbolic links.
Note
There must be a way to handle more complex naming. I’ll update this if I ever figure it out, or some kind soul explains.
Steps
Segment: Estimate Warp Field
- Open Matlab (and optionally navigate to the relevant directory).
- Type spm at the Matlab command prompt. This will open spm
- Click the fMRI button which will open the windows you need.
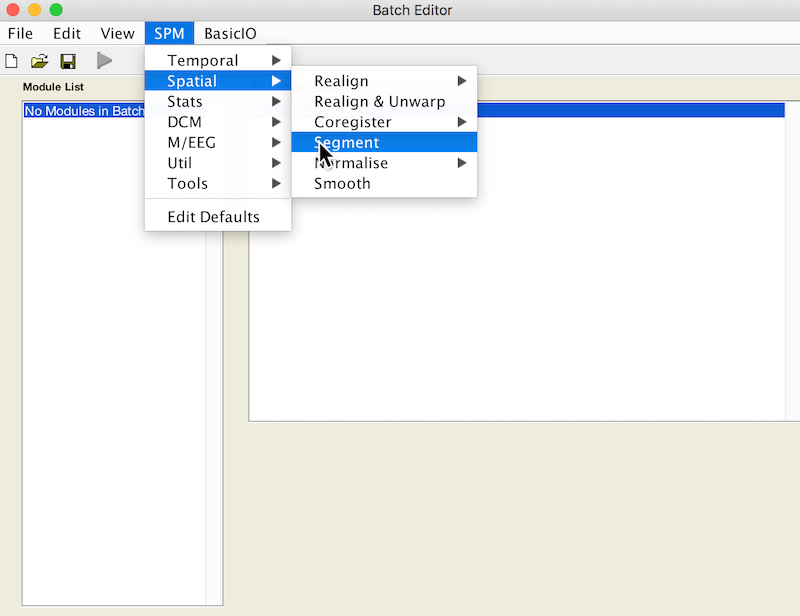
- Select Batch and from the menubar: SPM ➜ Spatial ➜ Segment
- Under Volumes, an X is displayed, indicating that this parameter must be specified. Specify the native space anatomical image (whole head) that you used to draw the lesion (remember to pick the simplified form, if you want to facilitate scripting).
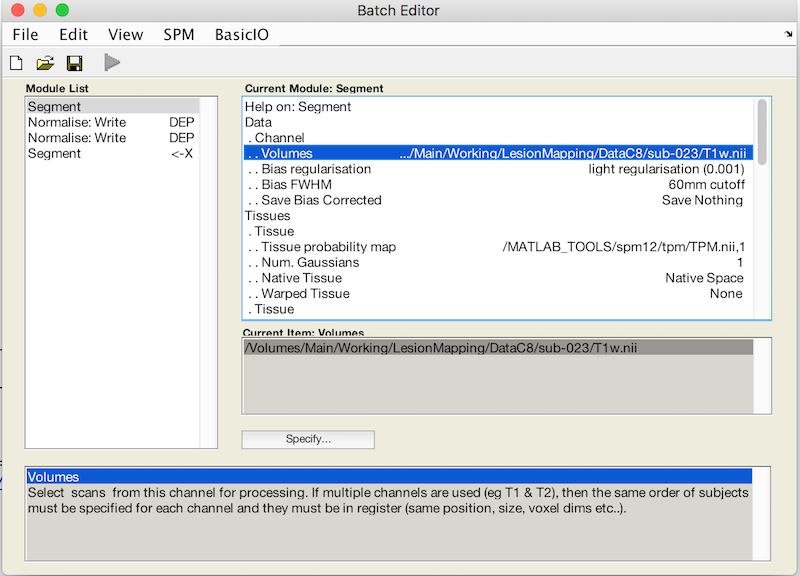
- Scroll down to the bottom of the module options, and set Deformation Fields to Forward. The Forward warp will be used to warp files from native space into standard space. If you elect to create an Inverse deformation as well, choose Inverse + Forward. That would create an additional warp allowing you to deform files from standard space into native space.
- This is your first batch module. Now we’ll add another.
Normalise: Apply Warp Field to Lesion Mask
- From the Batch editor, choose: SPM ➜ Spatial ➜ Normalise ➜ Normalise: Write
- This adds a second module to your batch
- Double click Data. Deformation Field and Image to Write now appear in the menu.
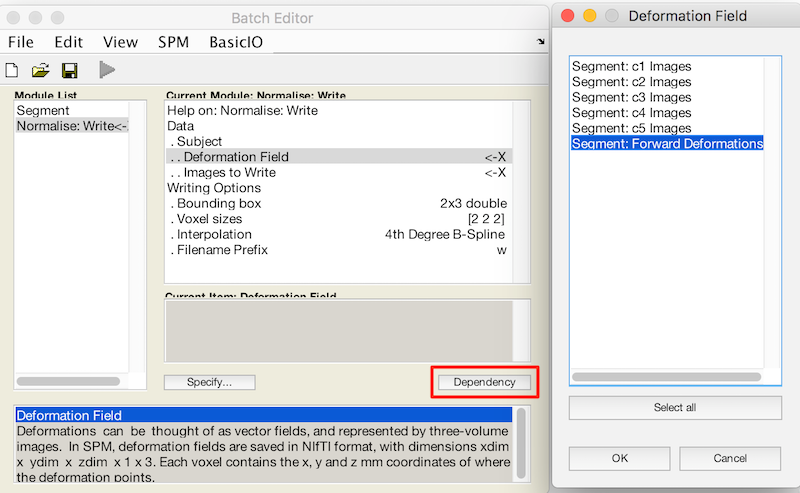
- For Deformation Field, click Dependency and select Segment: Forward Deformation to specify the y file, even though you have yet to create that file. Click OK.
- Under Image to Write, specify the native space lesion file that you want to warp.
- Under Interpolation choose Nearest neighbour This will insure the lesion mask keeps mask values at or near 0 and 1.
Normalise: Apply Warp Field to Anatomical Image
- You should apply the warp field to the original native space structural image. This is at minimum a sanity check because you can easily see inappropriate deformations of the whole head that you might not notice in the lesion file alone.
- Alternatively, if you have not created a lesion mask, then you can draw the lesion mask in standard space on the results of this section.
- From the Batch editor, choose: SPM ➜ Spatial ➜ Normalise ➜ Normalise: Write
- This adds a module to your batch
- Double click Data. Deformation Field and Image to Write now appear in the menu. Add the native space image for Image to Write.
- For Deformation Field, click Dependency and select Segment: Forward Deformation to specify the y file, even though you have yet to create that file. Click OK.
- Use the default interpolation: 4th degree B-Spline.
- All other values should be left as their defaults.
Run Batch and View Results
- Run the batch module by clicking the green go button (upper left on batch editor).
- Segmentation produces:
- Files prefixed with c for each tissue type and the skull.
- A seg8.mat file containing segmentation parameters.
- A deformation field image with y prepended.
- If you elected to create an Inverse deformation as well, that will be prefixed with iy.
- Normalization produces:
- A lesion image in standard MNI space. It has a w prefixed to the name to indicate that it has been warped.
- A structural image in standard MNI space, also with a w prepended.