SPM Lesion Normalization with Tissue Probability Maps
Goal: Warp a native space lesion mask (and optionally a native space anatomical image) into standard (MNI) space. In this procedure we use the lesion mask to define an additional tissue probability map (TPM) that influences the warp.
Data
Images must not be zipped (i.e., T1w.nii is okay, but T1w.nii.gz is not).
An anatomical (anatomical) image, usually T1 weighted, but could be T2 or flair weighted.
A lesion mask with values of 1 in the lesion and 0 elsewhere.
See Batch and Scripting for suggestions about file naming that will make it easier to script your resulting batch job.
Steps
Coregister: Reslice Lesion Mask to TPM Space
The lesion mask must be in TPM space before it can be used to define the additional tissue type.
Open Matlab (and optionally navigate to the relevant directory).
Type spm at the Matlab command prompt. This will open spm
Click the fMRI button which will open the windows you need.
Select Batch and from the menubar: SPM ➜ Spatial ➜ Coregister ➜ Coregister: Reslice.
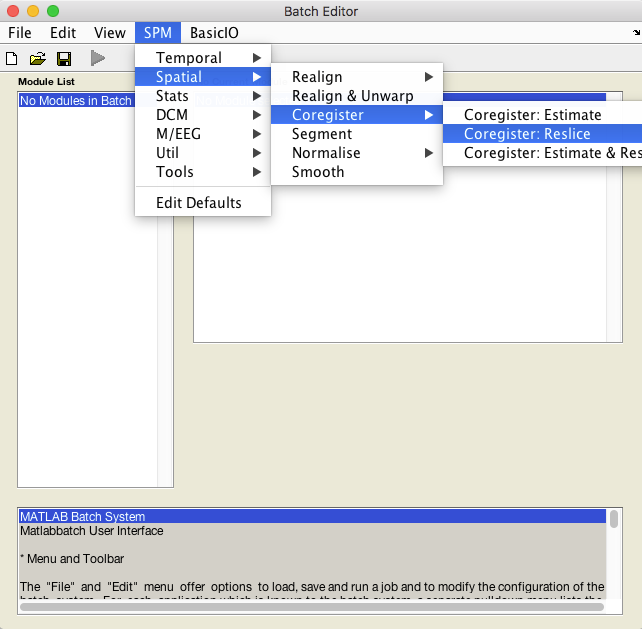
An X is displayed for the two parameters that must be specified: Image Defining Space and Images to Reslice.
The Image Defining Space is the TPM.nii, typically found in the spm12/tpm directory.
The Images to Reslice will be the lesion mask.
Under Interpolation choose Nearest neighbour This will insure the lesion mask keeps mask values at or near 0 and 1.
All other values should be left as their defaults.
This is the first module of your batch job.
Segment: Estimate Warp Field
From the batch editor choose: SPM ➜ Spatial ➜ Segment
Under Volumes, an X is displayed, indicating that this parameter must be specified. Specify the native space anatomical image that you used to draw the lesion.
Click Tissues in the module options.
Under Current Items: Tissue, click New Tissue.
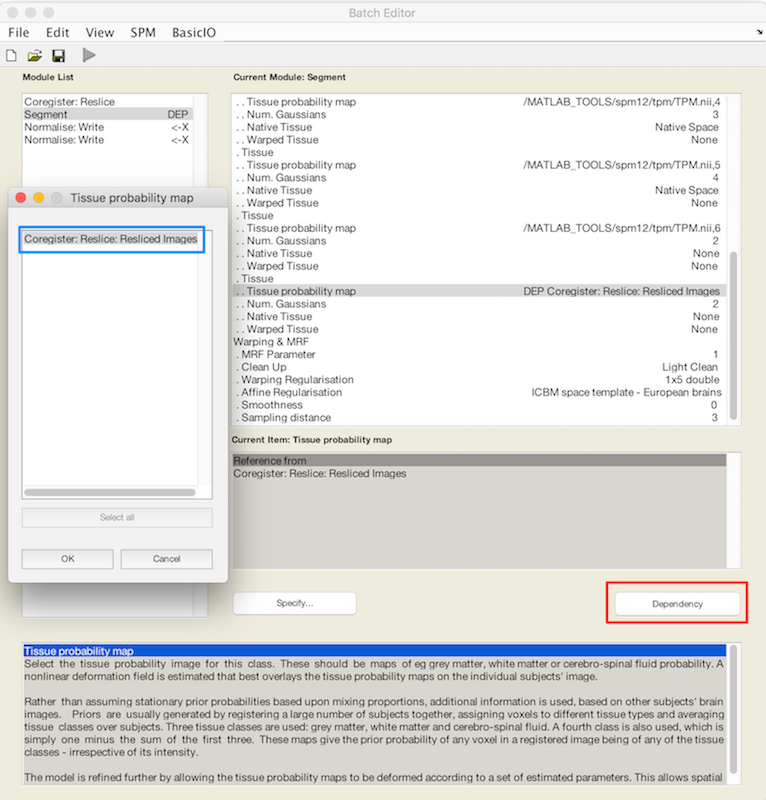
Scroll to the bottom of the tissue list, where you should find an X for Tissue probability map.
Choose Dependency (red box). In the popup Tissue Probability map choose Coregister: Reslice: Resliced Images (blue box). This is how you refer to the resliced lesion map r* that you have not yet created.
Scroll down to the bottom of the module options, and set Deformation Fields to Forward. The Forward warp will be used to warp native space images into standard space.
All other values should be left as their defaults.
This is the second module of your batch job.
Normalise: Apply the Warp Field to Lesion Mask
From the batch editor choose: SPM ➜ Spatial ➜ Normalise ➜ Normalise: Write
Double click Data. Deformation Field and Image to Write now appear in the menu.
For Deformation Field, choose the Dependency button and specify Segment: Forward deformations
Under Image to Write, specify the native space lesion file that you want to warp.
Under Interpolation choose Nearest neighbour This will ensure the lesion mask keeps mask values at or near 0 and 1.
All other values should be left as their defaults.
This is the third module of your batch job.
Normalise: Apply Warp Field to Brain and Head
You should apply the warp field to the original native space anatomical image as well. This is a sanity check because you can easily see inappropriate deformations of the whole head that you might not notice in the lesion file alone.
Repeat the first four steps above to add a fourth batch module.
Add the native space image for Image to Write.
Use the default interpolation: 4th degree B-Spline.
All other values should be left as their defaults.
This is the fourth module of your batch job.
Run Batch and View Results
Run the batch module by clicking the green go button (upper left on batch editor).
Reslicing produces a new lesion file prefixed with r to indicate it has been resliced.
Segmentation produces:
Files prefixed with c for each tissue type and the skull.
A seg8.mat file containing segmentation parameters.
A deformation field image with y prepended.
If you elected to create an Inverse deformation as well, that will be prefixed with iy.
Normalization produces:
A lesion image in standard MNI space. It has a w prefixed to the name to indicate that it has been warped.
An anatomical image in standard MNI space, also with a w prepended.